Flickering Windows screens can be painful, especially when playing games or working on video projects. There can be dozens of reasons behind flickering screens on Windows 11 or earlier versions.
An outdated graphic driver is one of the most common reasons behind this issue. If your Windows 11 screen is flickering, you can perform these checks and configure settings to resolve the issue.
Why Do I See a Flickering Screen on Windows
- Faulty or Loose Cables – If you are using a desktop PC, the first thing you should check for is a loose cable connection to your monitor. While using a laptop, you can check the broken or loose hinge connectors.
- Incompatible or Outdated Graphics Driver – Incompatible, outdated, or corrupt graphics drivers can cause screen flickering issues or distorted display issues on Windows. You should always ensure that you have the latest updated graphics driver installed on the PC.
- Incompatible Refresh Rate – If you have recently configured the refresh rate, you can configure it back to the default settings.
- Overheating CPU – If the CPN fan is not working correctly or the CPU is overheating, you can experience issues with the graphics card. It can be loose or there can be an issue with the hardware component.
- Software Compatibility – If you experience a flickering screen on Windows while using a specific software, there can be a compatibility issue. Some software requires specific graphic configuration. Always check for compatibility before installing the software.
Ways to Fix Flickering Screen on Windows
These small checks and settings can fix flickering screen issues on Windows.
Install Windows Updates
Step 1. Press Win + I to access Settings.
Step 2. Click on the Windows Updates tab in the left panel.

Step 3. Click on the Check for Updates button to scan and find new updates. Click on the Install All button to get the latest updates.
Disable Hardware Acceleration
Step 1. Right-click on the desktop and select “Display settings” from the context menu.
Step 2. Scroll down and click on “Advanced Display Settings.”
Step 3. In the new window, click on “Display adapter properties for [monitor name].”
Step 4. This will open the “Properties” window. Go to the “Troubleshoot” tab.

Step 5. Click on the “Change Settings” button.
Step 6. Move the Hardware Acceleration slider to the left to disable it. You can slide it to the “None” position. Click on the “OK” button to apply changes. Restart your computer and check if the flickering screen issue is fixed.
Adjust the Screen Refresh Rate
Step 1. Right-click on the desktop and select “Display settings” from the context menu.
Step 2. Scroll down and click on “Advanced Display Settings.”
Step 3. In the new window, click on “Display adapter properties for [monitor name].”
Step 4. This will open the “Properties” window. Go to the “Monitor” tab.

Step 5. Click on the Screen Refresh Rate menu in the next window.
Step 6. Select the highest refresh rate supported by your display. Apply changes and restart the computer to check if the issue is fixed.
Update Graphics Driver
Updating the graphics driver can resolve the flickering screen issue on Windows. We can search for the latest graphics driver for our graphics card and install it using these steps.
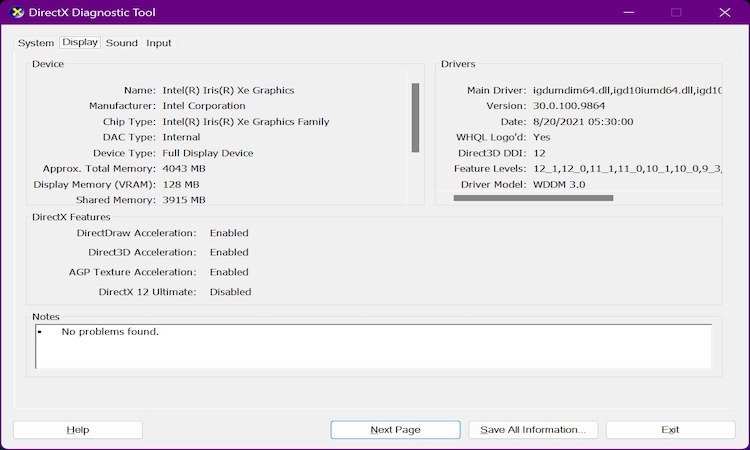
Step 1. Press Win + R, type DXDIAG and hit the enter key.
Step 2. DirectX Diagnostic Control window will come up. Click on the Display tab and collect the driver details from the left.

Step 3. Go to the manufacturer’s webpage and search for the latest graphics driver.

Step 4. Compare and check the version and date of release before downloading the latest drivers.
Step 5. Double-click on the setup file to install the drivers and follow the installation wizard.

Alternatively, you can use the Device Manager console to check the Display adapters. Right-click on the graphics card and click on the Update driver option.
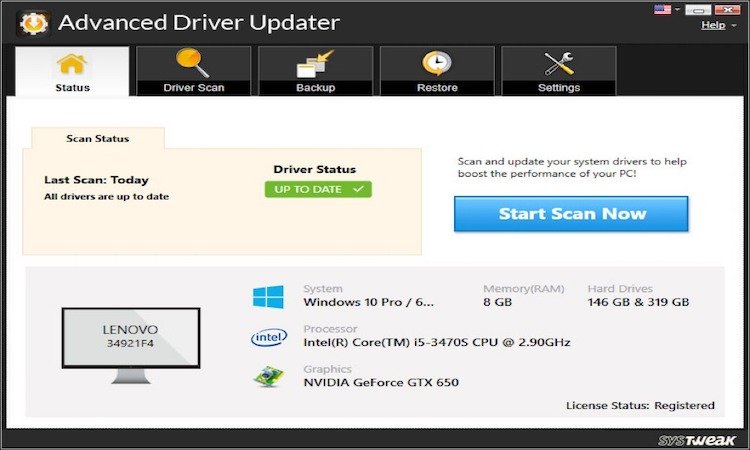
You can automate the process with one of the best driver updater software for Windows. We have compared the best driver updater software and listed Advanced Driver Updater as one of the best utilities to automatically keep all the device drivers up to date.
Use Best Driver Updater Software

Advanced Driver Updater is compatible with Windows 11 and earlier versions of the Windows operating system. It can enhance all the latest drivers to enhance the PC performance and you will never face any device driver issue.
It performs scheduled scans to look for all the outdated, incompatible, missing, or corrupt device drivers and updates them on a real-time basis.

Advanced Driver Updater has a huge library of device drivers that can update drivers for all known or unknown devices. It takes a proper backup before making any changes to the device drivers to roll back drivers in case of incompatibility issues.
It downloads the latest drivers from the manufacturer’s website or from trusted portals to ensure proper safety and keep infected files out of your PC. You can trust this application to minimize system crashes and improve hardware life.
Disable Power Saving Mode
Using a PC in power-saving mode can also result in flickering screen issues on Windows 11 or earlier versions. You can disable the power-saver mode and check if the issue is resolved.
Step 1. Press Win + R, type Control, and hit the Enter key to access the Control Panel.
Step 2. Click on the Power Options and then click on the Change Power-saving settings.

Step 3. Select High Performance or Balanced power plan and apply settings. Restart the PC and check if the issue is resolved.
Final Words
This article on how to fix the screen flickering issue in Windows has the root causes and resolution to fix the screen flickering issue. These tips and tricks can resolve driver conflicts and fix corrupt graphics drivers.
You can automate the process to update the driver with one of the best driver updater software for Windows.
